Tuesday, January 26, 2010

Josephine Collective Final Show feat. Black Oxygen


Hello,

I'm Back... WITH PHOTOS!!!

Okay so last Saturday I was allowed to shoot Black Oxygen and Josephine Collective (their final show). It was a grand old time being on stage and all. The only down side is how much my legs hurt from shooting which thoroughly confused me! They still hurt today and today is tuesday... so for the show I used two different styles of shooting for each band. For Black Oxygen I set up two SB-600 with radio poppers (which I recently purchased from the money I got from selling my 150-500) on each side of the stage and used a 15mm 2.8 to shoot with. Each flash was set to half power and my ISO was set to 1000. My shutter speed was set to roughly 40th of a second and my f/ stop accordingly depending on how far my subject matter was from the a given flash on a side of the stage. Since I have never shot a show before I had no idea how this word turn out which is why I used on Black Oxygen, because I can always shoot them again. I was hoping that this style would created a less consistent, but less cliche photo for them. It did. As for Josephine collective I went the traditional route and used the old: fisheye, low shutter speed, directly flash, and half exposed ambient. This is because I knew I could never shoot them again so I went the very consistent and pretty presentable route. So yeah I posted on of Black Oxygen at the top and Josephine Collective at the bottom. Hope you enjoy them the rest are at my flikr.

Wednesday, January 20, 2010

HEY SORRYY!!! IF ANYONE IS THERE!!!

I DIDN'T GIVE UP!!!! I PROMISE!!!!

okay so

I have been very busy with yearbook crap and helping my girlfriend and her sister's blogs' get off the ground.

Doing all the shooting for my girlfriends blog and photo consulting over her sister photos. You can check those out if you would like! If anyone comments ill make a post about yearbook stuff! but thats not going to happen so BYE!

I will post about the holga mod lens that I made soon but the lack of a really good photo with it is just delaying it...

only real photo i have don with it is here... shitty right?
In the mean time I'll be smoking more coffee and drinking for cigarettes!

Sunday, January 10, 2010

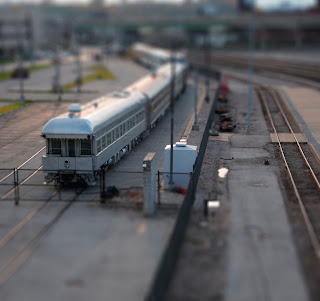
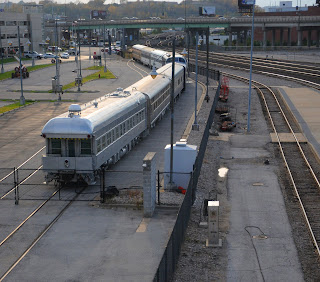
Look I Build Myself a Miniature Union Station


Hahaha actually not quiet!
For this older photo I used a photoshop technique that mimics the the look of a tilt-shift lens. If you you are not familiar with what a tilt-shift lens is it, it gives a narrow depth of field in a range that would usually be impossible for an average lens. Which gives the "Macro lens use" look to things not so small. Because small, close items usually cause a narrow DOF when shot (usually with a macro lens) our mind thinks that if things have a narrow DOF that they must be small. That is why things shot with a tilt-shift appear miniature.

So here is a quick tutorial on how to save yourself $800 on a tilt-shift lens by photo shopping the photos to appeal like tilt-shift.

First: Pic the photo you would like to use (best used on cars, buildings, and train shot from a higher elevation) and boost the the saturation to +30-40ish
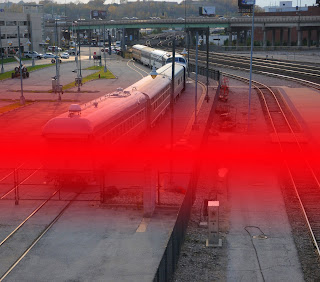
Second: Turn on your quick mask and then select the gradient tool and selects the four setting and mask the area that you would like to keep in focus.
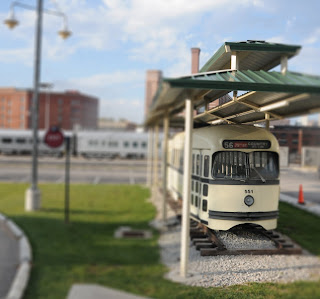
Third: When you have masked the area you would like to keep in focus, go to Filter>Blur>Lens Blur and the you adjust the lens blur until it looks right and Ca-chow! You have a Tilt-shift look-a-like photo. Here are also 3 more I took.
Good night. Didn't link the photos :( sorry!

Friday, January 8, 2010

My Mom's Shiny Red Camera


So my mom got a nice little red camera for her birthday, and it is a devious little devil that will never stop trying to take millions of photos of my family, girlfriend, and myself. This time i decided to turn the table and see how it likes being the photographed. Ha the jokes on you now Mr. "Point and Shot" (no offense to the Canon G-Series). So for this one I used the granite slab from the snowflake blog, a book for a one-sided snoot and a random piece of paper for a diffuser. Its a pretty inglorious set up but it did the job. The slaved flash was set to 1/4 power and I went to work. Here are some photo of the improvised bed studio.

Ps. It is very sad I'm doing this at 2a.m. saturday morning. I haven't showed for two days and I am really itchy and cold. Good Night.


Will it Ever Stop Snowing?


It has been snowing so long that snow has just replaced grass in my mind and that it would just seem weird if there wasn't snow on the ground. So since its still snowing I thought it would be a good idea to once again take advantage of the situation and shoot something snow related, actually not snow related, but snow itself. More like a snow FLAKE actually. Being the innovated mind I am I decided to rig myself a macro lens using:


-2 old 52mm filters (who needs filters anyway?) -$6
-2 50mm lens (one was 1.4 and the other 1.8) - Pre-owned
Ps. thanks Slade for letting me use your 1.8
-Hot glue gun - Pre-owned
-Tape that can seal light (I used the foil tape from the flash ring blog) - Pre-owned
- Exact-o Knife Pre-owned

So what you do is take the two old filters and break the glass out. Then you line one of the filters with hot glue on the female side and then push the other filters female side onto it and hold it there until the hot glue dries. When it dries make sure that there are no string or hot glue going where ever. Then take your tape and light seal the out side of the two filters witht eh tape wrapping it all the way around. After you do that cut away all the excess and there you go you have a 52 to 52mm macro converter. then you just screw both lens together and then you have a macro lens! For best results have the first lens at it highest f-stop and the other one at like f/8 on the lens its
self, not the camera because that is impossible. This is so you have a depth of field that is somewhat usable, because the DOF is extremely narrow.


I also made a cheap little macro studio made up of:
-A black granite tile - $5.96
-A cardboard box - Free (find one...)
- Two sheets of paper - Free (take from school)
- Tape - Pre-owned

So for this all you do is cut the flaps off one side of the box and then an entire side off of it. Then cut two windows on opposite sides of the box and tape the piece of paper over the windows. Put the box on top of the sheet of granite and there you have a cheap macro studio.
Okay for the actual shot I didn't use the windows on the box instead I used one Sb-600 directly pointing at the snow flake about 2-3 inches away. I sync the flash with a chord and shot at a shutter speed of 2600. (yeah pretty excessive but with the light that close it was much need)

Here are the pictures I cropped all but one which is the one I shot on the hood of my car (at the top of the post). When you use this macro lens the aperture of the second lens actually gets in the way of the shot that why I cropped them.

Here they are


Thursday, January 7, 2010

The Eyes Better Be In Focus


Eyes are the gateway to the soul some dude somewhere once said. So in a photo why would you want the persons soul out of focus? Eyes are THE strongest indicators of emotion and photography is all about capturing emotion as to spark the viewers emotions. Wether it portraits, sports or anything else with people if you want real power and emotion you eyes have to be visible and in focus. If the eyes aren't visible in a sports photo it loses a lot of power.

Notes about eyes-
I have blue eyes,
My girlfriend has blue eyes,
Babies' blue eyes are the best,
I love blue eyes,
They appear nice when photographed,
Brown eyes are like black holes,
That consume the pupil,
Unless they are super light,
Or Unless they are super lightED,
So WATCH OUT!
I don't know much about other colors,
Girlfriends kitty has pretty yellow eyes,
Especially when her pupils are like slits.

Here are some of my photos with eyes;
click for better quality

My Dad Was a Model Once and I'm Not Even Close

Looking for old Cub Scout and Boy Scout trinkets and photos for my Eagle Scout Court of Honor my Mom and I ran across a little treat! My Dad's old modeling flier/send out dealy... so after admiring it for a few minutes I was convinced I that I was going to attempt (If you even want to call it one) pose exactly like my dad, except for the fact all of his shot were shot on Hollywood Blvd. So I was hoping to make it out and shoot before the sun went down... that failed... so we went to the local dead mall and tried to shoot there (again if you want to call it a try) the shot were very rushed because the girlfriend hadn't eaten all day and these photos were the only thing between her and dinner. Not blaming the rush photo because I AM just plain ugly, but I think with a little more and effort they could have turned out a little better...

SO! here is my dad and me... side by side he's two years older than me in the photo but they were taken 25 years ago.

so yeah

Wednesday, January 6, 2010

Blizzard Round Three

Okay so today is the the third time blizzard conditions are going to hit the Metro Area and I decided to take advantage of the snow before driving conditions get feisty. So I grabbed my girlfriend and we set off to the "woods" which aren't much of woods really just just a corporate area called Corporate Woods where they have a park with a river near it. Because it was so cold we really only had like 10 minutes to set up and shoot before we would lose a toe or something. Poor girl got the worst because she was wearing heels walking through snow... it was about thirty feet from the car which we left on so we could hop back in a try to get warm again which took for ever for my thumb that had to stay exposed because I was using that hand to hold the camera.

So now onto what I did. Since I'v been creeping on my favorite blog strobist which is all about using portable lighting I decide to try and use my bounce flash umbrella as a fill to give her a little bit more light and stop and illuminate the snow. Because snow is one of the brightest natural light situations I had to put the flash to full power (always use manual on you flash and not TTL it gives you real consistency) and use an ISO of Lo 1.0 which is the lowest my camera goes. Then as for the exposure I set f-stop to f/4 and the shutter speed to 500 this would allow the ambient light to be slightly overpowered by the flash. So I placed the umbrella flash front right of the camera and started shooting.

This is what happened.

Tuesday, January 5, 2010

My Set Up

THIS IS MY SET UP:
-Nikon d300
-Nikon 50mm f/1.4
-Sigma 15mm f/2.8
-Nikon 18-105mm f/3.5-5.6
-Sigma 70-200mm f/2.8
-Sigma 150-500mm f/5.6-6.3
- 2 Nikon SB-600 Flashes
-Shoot Through Umbrella
-Bounce Umbrella
- 2 flash stands
- Ring Flash see blog
- Some Third Party Sync Cord

I will update when necessary

Here's a picture of some of it :)

Homemade Flash Ring


Hey.


This is the first of many posts to come about photography and anything worthy of blogging about.


So lets stop chewing the fat a get to the meat of this post!


OK so I made myself this handy little flash ring for only $15 (assuming that you have a Sb-600 flash or any other, a hot shoe sync cord, and a hot glue gun already)


ALL IT TOOK WAS!!!


-A bigger rounded tub-a-ware $1 (Dollar General)


-A smaller rounded tub-a-ware $2 (Dollar General)


-Foil tape $8 (Home Depot)


-Box Cutter $1.50 (Dollar General)


-A hard plastic cup $1 (Dollar General) ps. They are the thickness of baseball game beer cups.


SOOOO those are the ingredients now what about the recipe?!?!?


Well I found this neat little diagram that helped me make my own ;P http://farm1.static.flickr.com/89/239141592_29784dc484_o.png


oh... you need a flikr if your going to want to look at that...


AND! by the way my flikr acount is epicsanonymous


don't really update it too often but yeah.


ANYWAY!


Here are some photo that I took to test this out this morning First one is ME :) sorry for Low Quality :(


Here is the flash ring itself


So im not so sure of all the uses of it yet beside future fasion photo endevours, but I'll upload all the photos I take with it worth uploading!

OOOH the girlfriend just used my Ringflash for a Yearbook photo! here it is!